Homemade Reese's Cake Pops
Highlighted under: Cozy Desserts
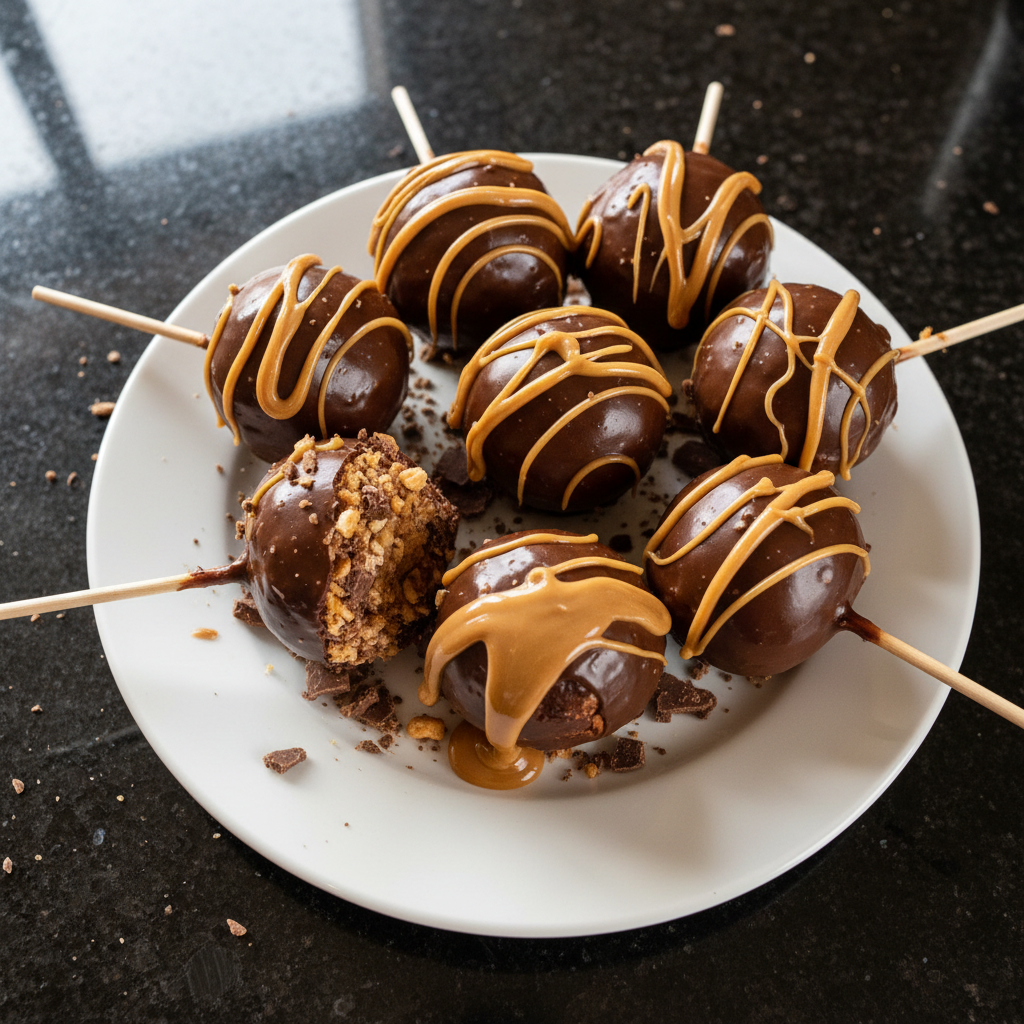
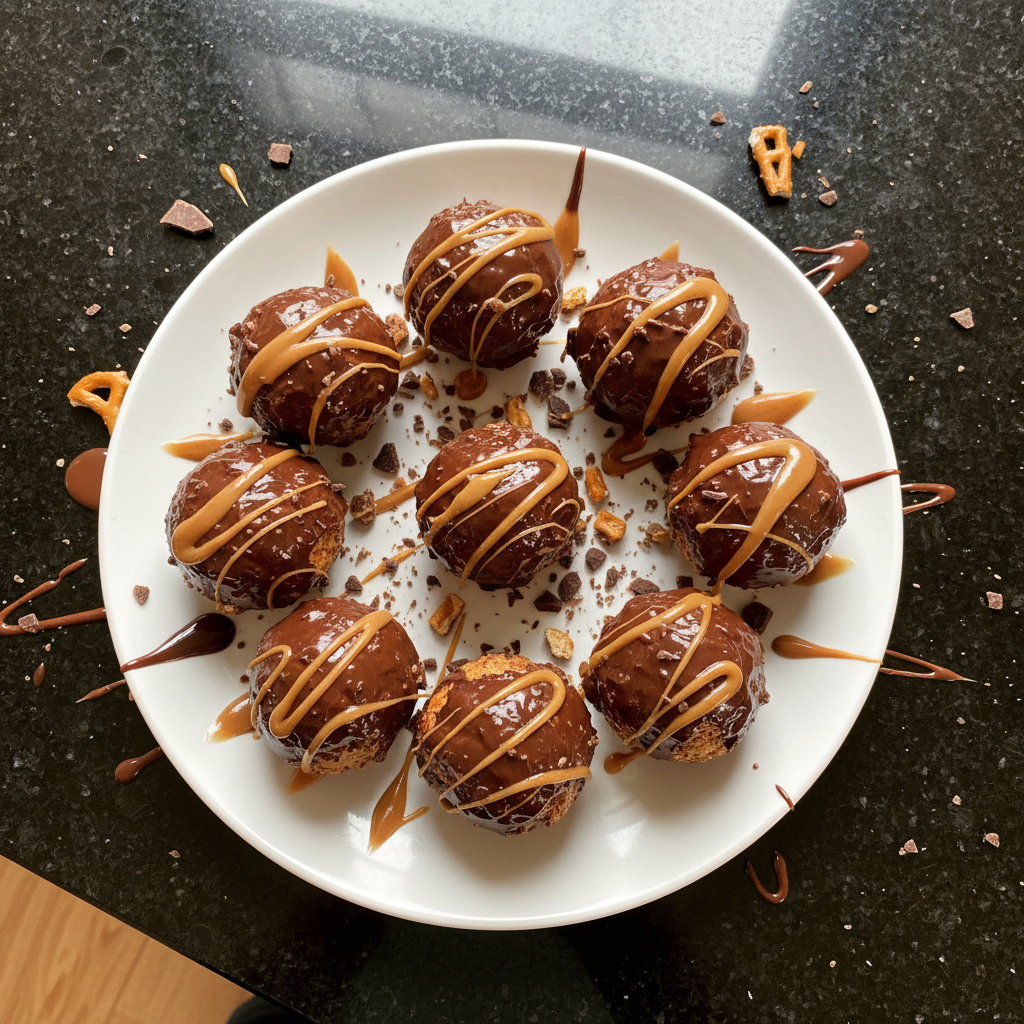
I love creating treats that combine my two favorite things: cake and chocolate. Homemade Reese's Cake Pops are the ultimate indulgence for anyone with a sweet tooth. The rich chocolate cake, paired with creamy peanut butter filling and dipped in smooth chocolate, makes these pops irresistible. Plus, they are perfect for any occasion, from birthday parties to casual get-togethers. I enjoy experimenting with the toppings as well—sometimes I sprinkle crushed peanuts or even drizzle white chocolate to elevate them. Join me in making these delicious bites of bliss!
Making Homemade Reese's Cake Pops was an exciting adventure for me. I had tried store-bought versions before, but nothing compares to the fresh taste and customizable nature of a homemade treat. I learned that using a moist cake base is crucial to keep the pops from crumbling when being dipped in chocolate. After a few trials, I nailed a recipe that balances the flavors beautifully.
One of my favorite moments was coating the pops in chocolate. I discovered that letting the chocolate cool slightly before dipping ensures a thicker coating that hardens perfectly. Plus, adding different toppings like crushed peanuts or sprinkles makes each pop unique!
Why You'll Love This Recipe
- Decadent flavor that combines chocolate and peanut butter
- Perfect bite-sized treats for any celebration
- Customizable with your favorite toppings
Creating the Perfect Cake Texture
Getting the right texture for your cake is crucial when making cake pops. You want a moist, tender cake that easily crumbles without being too dry. To achieve this, ensure you don't overmix your batter; mixing just until combined will give you the ideal consistency. Also, check for doneness by inserting a toothpick into the center of the cake—if it comes out clean, it’s ready.
Once your cake is baked, allow it to cool completely. This step isn't optional—cooling ensures that the cake doesn’t steam and become gummy when crumbled. After cooling, crumble it into fine pieces, which will blend more effectively with the peanut butter filling, leading to a smoother cake pop texture.
Peanut Butter Filling Pearfection
The peanut butter filling is what elevates these cake pops above regular cake bites. Using creamy peanut butter is essential, as it helps to create a smooth and cohesive mixture that binds the cake crumbs together. For a variation, you could try natural peanut butter, but do keep in mind that it may alter the texture slightly, making it a tad grainier.
When mixing the filling, start with the peanut butter and softened butter for a luxurious mouthfeel, then gradually add the powdered sugar. This method prevents clumps and ensures a consistent flavor. If the filling feels too soft, refrigerate it further until it's firm enough to roll into balls.
Perfecting the Chocolate Coating
Melting the chocolate properly is key to achieving a glossy finish on your cake pops. I recommend using a microwave in short bursts (about 30 seconds) while stirring in between to avoid any scorching. You want the chocolate to be smooth and drip off the back of a spoon without being too thick. If your chocolate is too thick, consider adding a teaspoon more vegetable oil to help thin it out.
When dipping, ensure the pops are chilled but not frozen, as freezing can cause them to crack when the chocolate hardens. After dipping, you can experiment with toppings like crushed nuts or sprinkles immediately, before the chocolate sets. This gives a visually appealing finish and adds texture, enhancing each bite.
Ingredients
Gather these ingredients to make your delicious cake pops.
For the Cake
- 1 cup all-purpose flour
- 1 cup sugar
- 1/2 cup unsweetened cocoa powder
- 1 tsp baking powder
- 1/2 tsp salt
- 2 large eggs
- 1/2 cup milk
- 1/2 cup vegetable oil
- 1 tsp vanilla extract
For the Peanut Butter Filling
- 1 cup creamy peanut butter
- 2 cups powdered sugar
- 1/4 cup unsalted butter, softened
For Dipping
- 2 cups chocolate chips (dark or milk)
- 1 tbsp vegetable oil
Be creative with toppings such as crushed nuts or sprinkles!
Instructions
Follow these simple steps to create your cake pops.
Bake the Cake
Preheat your oven to 350°F (175°C). In a bowl, mix together all cake ingredients until smooth. Pour the batter into a greased 9-inch round cake pan and bake for 25 minutes. Allow the cake to cool completely before crumbling it into fine pieces.
Make the Filling
In a separate bowl, combine peanut butter, powdered sugar, and softened butter until well mixed. Roll the mixture into small balls, about 1 tablespoon each. Freeze these for at least 15 minutes to set.
Form the Cake Pops
Once the cake is crumbled, mix it with the peanut butter filling until well combined. Roll the mixture into balls, inserting a lollipop stick into each one. Place them in the refrigerator for about 30 minutes to firm up.
Dip the Cake Pops
Melt the chocolate chips and vegetable oil in a microwave-safe bowl, stirring until smooth. Dip each cake pop in the melted chocolate, allowing excess to drip off. Set on a baking sheet lined with parchment paper. Add any toppings you desire before the chocolate hardens.
Enjoy!
Once the chocolate has fully set, your Homemade Reese's Cake Pops are ready to serve! Enjoy them at room temperature or chilled—either way, they're sure to be a hit!
Experiment with different flavors and fillings for variety!
Pro Tips
- For easier dipping, ensure the chocolate is not too hot—cooling it slightly will help coat the cake pops better. You can also use a dipping tool to help keep your hands clean.
Make-Ahead and Storage Tips
For convenience, you can prepare the cake and peanut butter filling a day in advance. Once shaped into balls and chilled, store them in an airtight container in the refrigerator. Just make sure to line them between layers of parchment paper to prevent sticking. They can last up to a week in the fridge, so feel free to make them ahead for special occasions.
If you want to freeze your cake pops, allow them to set completely after coating with chocolate. Once set, place them in a single layer on a baking sheet, freeze until solid, and then transfer them to a freezer bag. They can be stored for up to three months. Thaw them in the refrigerator overnight before serving for the best texture.
Creative Variations to Try
Feeling adventurous? You can switch up the flavors in your cake pops! Try using a vanilla cake base instead of chocolate for a lighter flavor. Pair it with almond butter in the filling for a nutty twist. Alternatively, experiment with different types of chocolate coatings—white chocolate adds a sweet touch, while dark chocolate offers a rich contrast.
For a touch of fun, consider incorporating flavor extracts into your cake batter, like a hint of espresso powder for mocha cake pops or a dash of coconut extract for tropical flair. The possibilities are endless, and each variation can delight your guests with a new taste experience!
Troubleshooting Common Issues
If your cake pops are falling off the stick after dipping, it could be due to a few factors. Ensure the filling is cold enough before inserting the stick; warm cake pops can expand and loosen. Also, check that the chocolate coating is not too thick, as excess weight can pull the pops apart.
Another common issue is chocolate that won't stick to the cake pops. This could happen if the pops aren’t chilled enough or if the chocolate is not properly melted. Thoroughly coating the pops and allowing them to set at room temperature before refrigerating can help fix this problem. With a little attention to these details, you'll achieve perfect cake pops every time.
Questions About Recipes
→ Can I use cake mix instead of homemade cake?
Yes, you can substitute store-bought cake mix for homemade if you're short on time.
→ How long can I store these cake pops?
They can be stored in an airtight container in the fridge for up to a week.
→ What can I use instead of chocolate chips?
You can use melting wafers or colored candy melts for a fun twist.
→ Is there a gluten-free option?
Yes, use gluten-free all-purpose flour as a substitute to make the cake suitable for gluten-free diets.
Homemade Reese's Cake Pops
Created by: The Treatfulkitchen Team
Recipe Type: Cozy Desserts
Skill Level: Intermediate
Final Quantity: 16 cake pops
What You'll Need
For the Cake
- 1 cup all-purpose flour
- 1 cup sugar
- 1/2 cup unsweetened cocoa powder
- 1 tsp baking powder
- 1/2 tsp salt
- 2 large eggs
- 1/2 cup milk
- 1/2 cup vegetable oil
- 1 tsp vanilla extract
For the Peanut Butter Filling
- 1 cup creamy peanut butter
- 2 cups powdered sugar
- 1/4 cup unsalted butter, softened
For Dipping
- 2 cups chocolate chips (dark or milk)
- 1 tbsp vegetable oil
How-To Steps
Preheat your oven to 350°F (175°C). In a bowl, mix together all cake ingredients until smooth. Pour the batter into a greased 9-inch round cake pan and bake for 25 minutes. Allow the cake to cool completely before crumbling it into fine pieces.
In a separate bowl, combine peanut butter, powdered sugar, and softened butter until well mixed. Roll the mixture into small balls, about 1 tablespoon each. Freeze these for at least 15 minutes to set.
Once the cake is crumbled, mix it with the peanut butter filling until well combined. Roll the mixture into balls, inserting a lollipop stick into each one. Place them in the refrigerator for about 30 minutes to firm up.
Melt the chocolate chips and vegetable oil in a microwave-safe bowl, stirring until smooth. Dip each cake pop in the melted chocolate, allowing excess to drip off. Set on a baking sheet lined with parchment paper. Add any toppings you desire before the chocolate hardens.
Once the chocolate has fully set, your Homemade Reese's Cake Pops are ready to serve! Enjoy them at room temperature or chilled—either way, they're sure to be a hit!
Extra Tips
- For easier dipping, ensure the chocolate is not too hot—cooling it slightly will help coat the cake pops better. You can also use a dipping tool to help keep your hands clean.
Nutritional Breakdown (Per Serving)
- Calories: 250 kcal
- Total Fat: 15g
- Saturated Fat: 6g
- Cholesterol: 20mg
- Sodium: 150mg
- Total Carbohydrates: 30g
- Dietary Fiber: 1g
- Sugars: 18g
- Protein: 4g